

Are you ever told that your bike gear is too big or too small? It can be tough to understand the cycling jargon around bike development, sprockets, chainrings, and gears, especially if you’re new to cycling or not a pro. But fear not! I’m here to help demystify this language without any fuss.
Do you know which development to use for a flat course or a hill climb? What does it mean to “roll on the plate?” If you want to find the right bike development and stop getting teased by your friends, then let’s dive into all the cycling terms related to bike gears and developments.
If you’re interested in the different systems involved in the transmission of a bicycle, you’ve come to the right place. Here’s an overview of the mechanisms needed to move your bike forward.
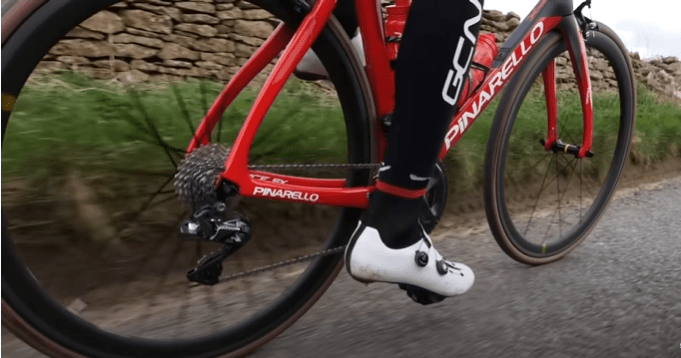
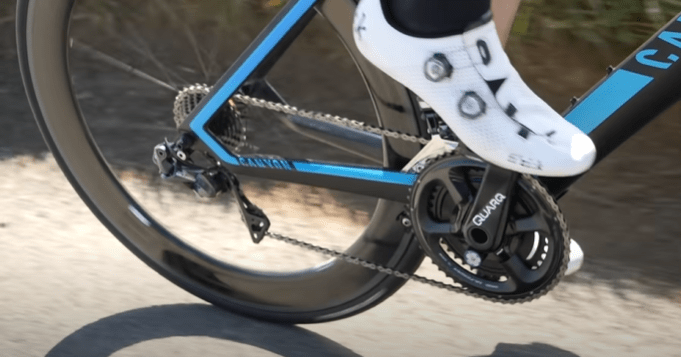
First up is the chainring, which is a notched disc located at the front of the crankset. The large-toothed wheel, called a plate, is situated at the level of the pedals and serves as the link between the pedals and the chain. When you pedal, the force drives the chain through the teeth of the chainring.
The number of teeth on a chainring can vary, with most having between 30 and 52 teeth. The rule is that the smallest notched disc, with the lowest number of teeth, is always on the frame side. A larger chainring allows you to pedal harder with a lower cadence, while a smaller chainring makes pedaling easier but requires a higher pedaling frequency.
If you want to be comfortable on all terrains, you may want to consider a triple chainring. This system comprises a small chainring of 30 teeth, an intermediate chainring of 38 or 40 teeth, and a large chainring with 48, 50, or 52 teeth. This setup provides various combinations, such as 52/40/30 or 48/38/30, for example.
Road bikes with 3 chainrings are becoming less common as manufacturers seek to make bikes lighter. Racing cycles are seeing their 3 chainrings eliminated, especially with the appearance of compact cranksets and 11 or 12-speed cassettes.
The double chainring is the configuration of road bikes, which typically have two chainrings of different sizes. When you buy a new road bike, it often comes equipped with a set of 53/39 (53 teeth for the large chainring and 39 teeth for the small) or 53/38 chainrings. However, you can change the chainrings to adapt to your practice, such as 52/42 for planes or 50/38 for mountain terrain. Use the large chainring on flat terrain and the small chainring for uneven ground.
If you want a good compromise, consider compact chainrings that allow for small chainrings with less than 38 teeth, unlike the standard double chainring. There are two categories of compact Shimano or Campagnolo cranksets: mid-compact in 52/36 or compact in 50/34, and for the strong ones in 53/39. Sram compact cranksets are also available in 46/33, 48/35, or 50/37. Gravel bikes are starting to come equipped with Shimano GRX in 46/30.
If you’re looking for simplicity and lightweight, the mono plateau, which uses a single chainring, may be ideal for technical terrain. Cyclocross has adopted this type of crankset, and it can be found on gravel, cyclocross, and some road bikes. The chainring typically has 38 to 46 teeth, providing less development readily available at equivalent gears.

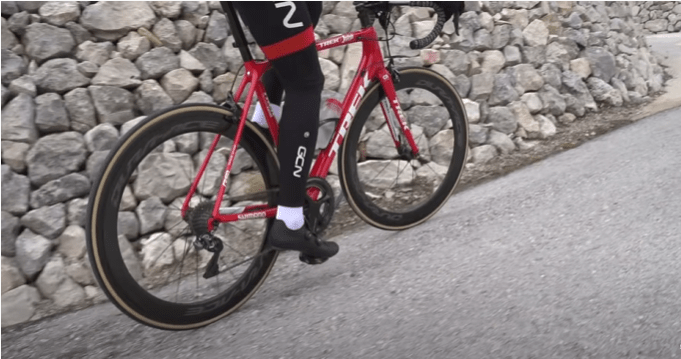
In cycling, gears aren’t complete without mentioning the rear cassette. The rear cassette functions similarly to the chainring, but instead of being located at the front of the bike, it is connected to the back wheel. The cassette’s toothed wheel rotates the wheel via the chain, which runs through its teeth.
Rear cassettes come in different sizes, with a number of teeth ranging from 11 to 30 teeth (starting at 10 for SRAM).
Why would you want a cassette with more teeth? It’s because it takes less effort to turn the wheel…
When the cassette is twice the size of the chainring, a single pedal stroke rotates the wheel halfway. This means you will travel further with each pedal stroke.
Conversely, when the cassette is half the size of the chainring, one pedal stroke rotates the cassette and the wheel twice. This means you’ll have to pedal harder, but the wheel will travel a greater distance with each rotation.
When we talk about bike gears, we can’t ignore the bike cassette. It’s the set of gears located at the rear wheel that consists of different-sized discs.
Unlike the chainring, the largest disc of the cassette is placed against the wheel, which requires more effort to rotate. A typical bike cassette has between 7 and 12 sprockets, with each sprocket corresponding to a different speed.
However, keep in mind that the more sprockets a cassette has, the more strain it puts on the chain. Nowadays, with a single chainring crankset, you can find cassettes with 11 or 12 speeds to achieve a wide range of gearing options. These cassettes have a large amplitude, such as 11/50 (10/52 at Sram).
To identify a bicycle cassette, you should look at the number of teeth of the extreme sprockets. For example, if a cassette is labeled 12/25, it means that the small outer sprocket has 12 teeth and the large inner sprocket has 25 teeth. These extreme gears are referred to as “toothing.”
Single chainring transmissions often use cassettes with 50 teeth, making them easy to identify. Overall, understanding the bike cassette is crucial in selecting the right gearing options for your riding needs.
The teeth on the chainrings and sprockets are what enable the chain to transfer the force from pedaling. The number of teeth on the discs corresponds to their size, meaning that larger discs have more teeth (it makes sense!).
The bicycle chain links the chainrings and sprockets, and converts the pedaling motion into movement of the rear wheel. It’s an essential component that directly affects the bike’s performance. Due to its constant use, the chain undergoes wear and tear, and it’s recommended to replace it every 5000 km to ensure optimum efficiency.
A bicycle derailleur is a mechanism used to change gears. It allows the chain to move and align with the appropriate gear on the cassette or chainring. Gear shifting typically occurs at the top or bottom of the chainring teeth.
There are two types of derailleurs: front and rear. The front derailleur shifts the chain between the chainrings using the chain tension generated by pedaling. You can switch between the smaller and larger chainring using the lever or left handlebar located on the handlebars.
The rear derailleur, on the other hand, adjusts the chain tension using a spring to prevent the chain from slipping off. It also varies the power of the gears. To shift gears with the rear derailleur, use the lever or the right handlebar on the bike frame.
The bike’s transmission is composed of several elements, which together are called the crankset. The crankset consists of the cranks, which are located between the pedals and the crank axle, the chainring attachment that has stars with 4 to 5 branches, the cranks, and the thru-axle of the crankset, which is also called the bottom bracket.
The complete bicycle transmission group includes several components, including:
Groupsets are exclusively designed by Shimano, Sram, and Campagnolo. You can find both mechanical and electronic transmissions.
If you’re ready to move beyond the basics, let’s talk about how to find the right gear for your bike.
As a beginner, it’s important to understand the gear ratio, which is the number of teeth on the two discs (chainring and pinion) where the chain is positioned. The gear ratio is represented by two numbers: the first number is the number of teeth on the chainring and the second number is the number of teeth on the pinion. To calculate the gear ratio, simply divide the number of chainring teeth by the number of pinion teeth. For example, if someone rode a “50 × 11”, it means that they rode with a 50-tooth chainring and an 11-tooth sprocket.
When we talk about bike development, we calculate the distance covered in one turn of the pedals for a given gear. To calculate the bike development, you can use the Bicycle Gear Calculator simulator, which allows you to define the development of the bike based on your pedaling cadence and the circumference of the wheel. Alternatively, you can use the formula: Development (in m/rev) = wheel circumference x gear.
To find the right gear, you must start from the pedaling frequency or cadence. For an easy ride on flat terrain, aim for a medium frequency that allows you to move forward without tiring yourself, around 80-85 revolutions per minute. Going uphill, aim for a cadence of 50 to 65 rpm instead. The lower your cadence, the harder you force, so adjust your gear accordingly. Similarly, if you “reel” too much, which means turning your legs too much in a minute, you may not be able to keep up with the pace for a long time.
When you change gears, you change the ratio between the chainring and the gears. You will change gears more easily than chainrings. To maintain a regular effort, you should change gears when the effort becomes too difficult or too easy. It’s easier to lower the gears to gain ease by climbing on higher gears.
You should anticipate gear changes before a climb. If you are on a too big development in the full hill, it is difficult to change chainrings or sprockets because of the chain tension. You must release the tension of the chain during the gear change before attacking the climb.
To spare your chain, you should avoid contradictory ratios between small chainring/small sprocket or large chainring/large sprocket. The angle between the chain and the teeth of the discs is too great, so avoid too much chain crossing. This is called “crossing the chain” and it’s not the most efficient way to ride.
Now that you understand how the bicycle gear system works, you can impress your friends or significant other with these expressions related to gear changes.
Large gear refers to the configuration that allows you to cover a longer distance with one turn of the pedals. On a double platform, you can roll on the large platform when riding on flat terrain and modulate your speed by changing gears. If you switch to a small cog, you can ride faster.
When referring to big developments, common expressions include:
If you want to make your pedaling easier, you can try these expressions:
In summary, changing the bike gear according to your course or capacity depends on whether you want to pedal hard or with ease. You can use the gear to find the ideal development that suits your needs. The bicycle gear that solicits the discs on the side of the frame makes you move more slowly but more easily, while those located on the outside make you ride faster and more powerfully.